Tags: create a party, blogger.com
This tutorial takes you through the process of creating a link party with images in the administration interface of InLinkz and putting it in your Blogger blog.
Sign in to Inlinkz
Create a new link party
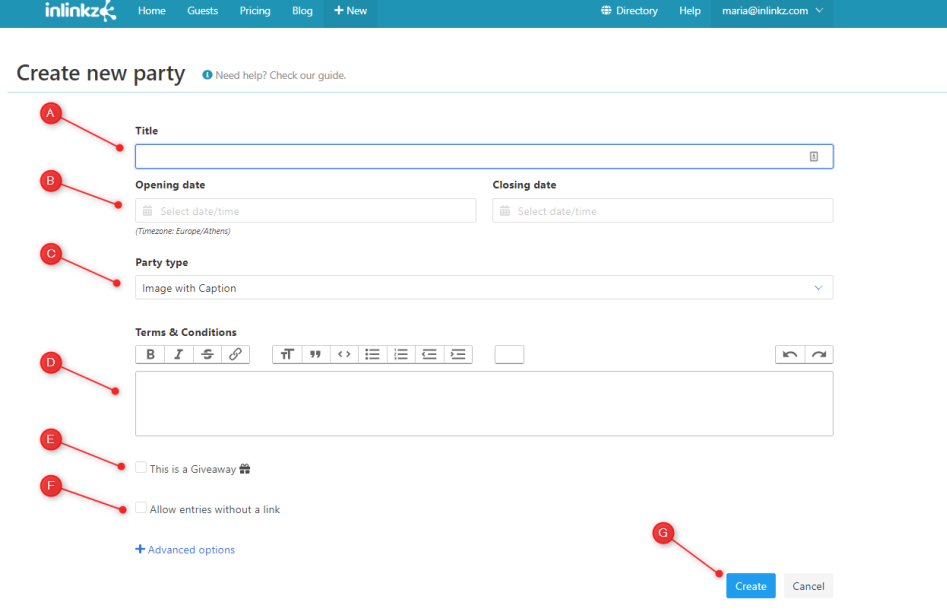
a. The Title will be displayed on your dashboard as well as on InLinkz Directory.
b. The Opening and the Closing date determine the duration of the link party. No links can be submitted after a party closes.
c. Choose whether your collection will be a thumbnail collection with captions or only images (Party type).
d. The Terms & Conditions will show on your blog just before the entries.
Note: If you want to get an email each time an entrant submits a link, enable the Email Preferences from your Settings.
e. Click on the giveaway checkbox, if this is a giveaway.
f. To allow entries without a link, click on the relevant box.
To learn about the +Advanced options, click here.
g. Click Create and you will instantly be transferred to your Home page.
f. To allow entries without a link, click on the relevant box.
To learn about the +Advanced options, click here.
g. Click Create and you will instantly be transferred to your Home page.
Get the code
1. To get the code for the link party, click on the Copy Code button.
2. Copy the code.
3. Open your Blogger editor.
4. Paste the code into your blog post while in HTML editing mode. Don't switch back to preview.
Note: If you are not in HTML edit mode, the code will not be entered correctly.
5. Publish your post.
The link party is live on your blog!
Here is what your readers will view, once the party opens for entries: